To use SAP with other languages, you must perform a language import or supplement (use transaction SMLT).
Changes in the language environment usually require changes in the code page setup, which requires changes in some database tables and in the profile files.
The language environment that comes with the standard SAP installation includes German and English.
Before starting the language import, read the following SAP Notes
Note 18601 – Frequently asked questions about language transport
Note 43853 – Consulting: Language-dependent + client-specific C-tables
Note 352941 – Consultation: Languages and Support Packages
PREREQUISITES
To correct the language, you need to access the Support Package files. These files can be in several different formats:
• Transport requests
• EPS package in the EPS Inbox
• CAR or SAR archive in the tmp sub directory of the transport directory
• Collection CD.
OPERATIONS
Make sure you are installing languages in 000 client.
- Once you installed languages you can not revert back.
First go to SMLT and check the installed languages, by default you find English and German.
First we need to add the language in I18N to start with installation
Please to I18N tcode and click on System configuration
As per below screen shot please define the language code by clicking on add button
You can see the below screen for New NLS Configuration activation
Click on Yes to continue, Below screen will display
We need to maintain parameter zcsa/installed_languages in the profile and add new languages being installed in the parameter like below
- zcsa/installed_languages = DETS
Restart SAP for parameter to be activated.
Now we successfully configured CS language, then execute the SMLT tocode
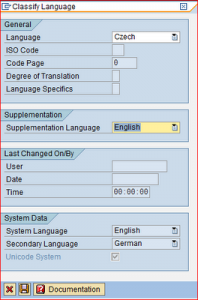
Click on Language create TAB, which is showing in above screen shot, Then it display the screen below
Select the language from General section language tab
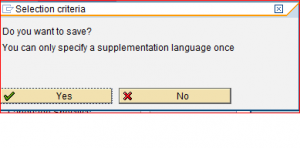
- Do not forget to mention supplementation language in Supplementation section
Now you have successfully saved the language.
Go to the language which you want to install
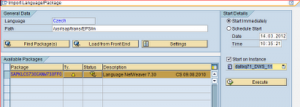
Top of the screen you can see language –>Import Packages.
After you have specified a start time and (optional) target server, choose Execute to import the language package(s) you have selected.
The first three of these options are supported automatically.
If you use a Collection CD to access Support Package data, you must specify the path to the CD.
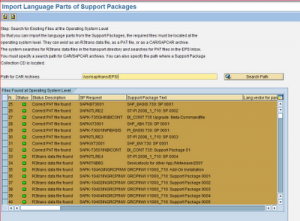
Step: Searching for existing files at the operating system level.
To import Support Packages, you require data in the following form
• R3trans data file of the Support Package request
• The PAT file of the Support Package
• The CAR archive of the Support Package.
- The tool first searches for R3trans data files in the data directory of the transport directory, followed by PAT files in the EPS Inbox (usually $(TRANS_DIR)/EPS/in), and finally CAR archives in the directory $(TRANSDIR)/tmp.
You have the option of searching for CAR archives in other paths.
Enter a path and start the search.
The system also searches for sub directories, so that you only need to specify a single path to search a Support Package Collection CD.
Caution: When searching for suitable CAR archives, the system assumes that a CAR archive with the name Kxxxxxx.CAR contains the Support Package SAPKxxxxxx. This is always the case with Sap Net downloads and Support Package Collection CDs.
In the next dialog box, enter the path for the language packages.
Choose Find Package(s) to search for any available packages in the path you have entered
Click Yes to continue the same.
An import action is created for the appropriate language on the overview screen of transaction SMLT. There are various functions in the overview for managing and monitoring the import.
Please check the above screen shot truck symbols shows that language import is running. you can check the corresponding logs and jobs by click on the options
Clicked on job monitoring, it displays the above screen.
After successful implementation you need to import the related support packs,
The green, yellow and red lights next to the packages indicate whether you can import them. Click the lights to display extra information.
A green light indicates that all import conditions have been met, a yellow light indicates that there are warnings, and a red light indicates that the package cannot be imported because checks have detected errors.
Select one or more language packages with green or yellow lights for import.
Import Language Content of Support Packages
PURPOSE
All Support Packages delivered by SAP have been translated completely. Support Packages can be used to deliver missing translations, or correct incorrect translations.
If you install a language after you have imported Support Packages into your system, you may have overwritten new Support Package translations with obsolete translations. The language is then inconsistent.
To correct the language data, you need to import the language part of the Support Package. This program supports you in this with the following functions:
• Check language data to see whether it is correct.
• Determine which Support Packages are in the system, and which Support Package translations need correcting.
INTEGRATION
To access this program, call transaction SMLT and choose Goto -> Other Tools.
Important: Not all required files need to be available at the same time. You can start the import with the first X files and then continue later with file X+1. A restart function is available for doing this.
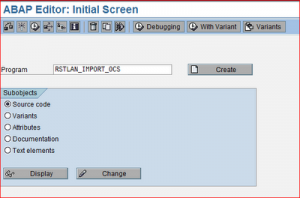
Using the Program, go to SE38 and run the below report
Use the report RSTLAN_IMPORT_OCS to extract the language-relevant information from each support package
Select the language which you want to do the import language support packages
Step: Selecting the Support Packages
All Support Packages are categorized with a traffic light as follows:
Green: No import is required for these Support Packages
Yellow: No import required
Red: Import required
All Support Packages with red lights are already selected.
You can also select Support Packages with yellow lights (however, this is not normally necessary).
Go to the next screen (F6). When you do this, the system searches for usable files in the file system.
Proceed to the next screen (F6).
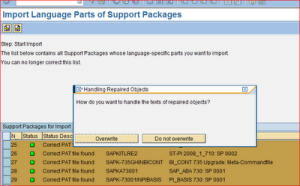
Step: Starting the import
The import queue appears. Choose F6 to start the import process.
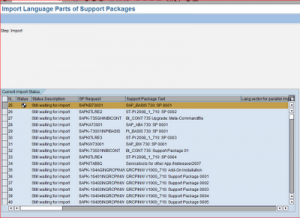
Step: Importing
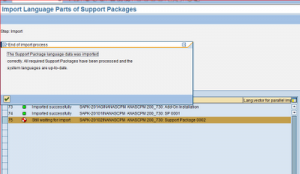
All Support Packages are processed, one by one. The import is online, as in transaction SPAM. There should not be any timeout problems. The import of a Support Package involves the following steps:
• Copy the CAR archive to $(TRANS_DIR)/tmp, if necessary.
• Extract the CAR archive, if necessary. This creates a PAT file.
• Disassemble the PAT file, if necessary. This creates an R3trans data file.
• Import the R3trans file in special mode.
Files created temporarily by the import process (CAR archive in $(TRANS_DIR)/tmp, PAT files and R3trans files) are deleted as soon as possible to avoid overflows in the file system. However, large import logs are written to the log directory of the transport directory.
Possible Errors
Some errors are possible during the import process. If an error occurs, the program stops, and an error message appears in the status bar. You can restart the import process after you have removed the error. Double-click the error message in the status bar to display information about the error and troubleshooting measures.
Logs
Transaction SMLT creates a new action with the name OCS_IMPORT_<(> <<)>ISO code>_ under the import actions for the language.
The processed Support Packages are listed under this action.


